Valerie Sonnenberg
Drill Powered Vehicle
In Component Design, we were tasked with creating a vehicle that was powered only by one hand drill. Our team decided to build a small bicycle. We were allowed to cannibalize the fork and wheels from another bike, and the rest was built from scratch by our team, including the gears, sprocket, drill mount plate, and frame. I was the main CAD engineer on the project and handled all the manufacturing drawings, as well as helping with the actual machining process.
Process
Initial Brainstorming
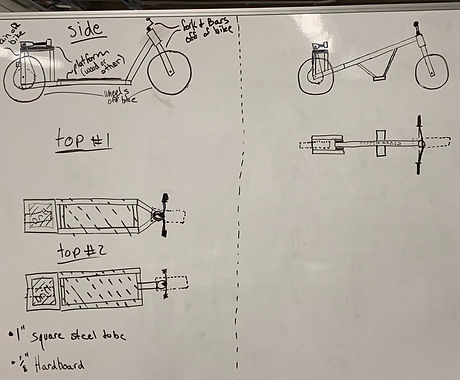
After our task was given to us, our team brainstormed ideas of how best to deisgn the vehicle for agility, speed, and reliability. We came up with these two ideas as our finalized versions, and chose the design on the right to continue forward.
Preliminary CAD
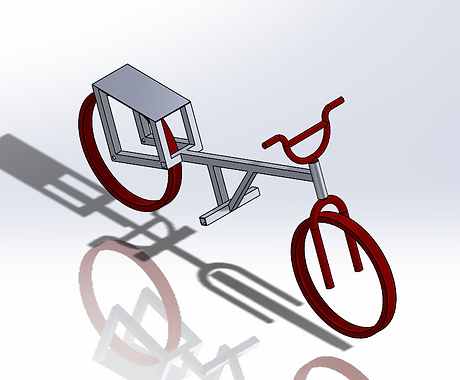
The first step after brainstorming was a rough CAD model to give a general idea of the bike's shape and size. This preliminary CAD model was created in a short amount of time with not much attention to detail, to simply get the ideas down.
CAD for manufacture
This model was far more specific, detailing each part. After designing each part and making sure it was exactly how it should be, we finalized the CAD. Each part had its own drawing and manufacturing process, as we began the manufacturing stage of the project.

Manufacture
Our completed bike was manufactured by cutting, welding, milling and grinding, and sandblasting our materials. In the end, we had created a working drill powered vehicle.

Beautification CAD
After we had a working vehicle, we did a lot of testing and made sure it was reliable for race day. Once we were comfortable that our bike would work, we spent some time with the aesthetics. I added some beautification to the CAD to see how we would like it to look by the end.

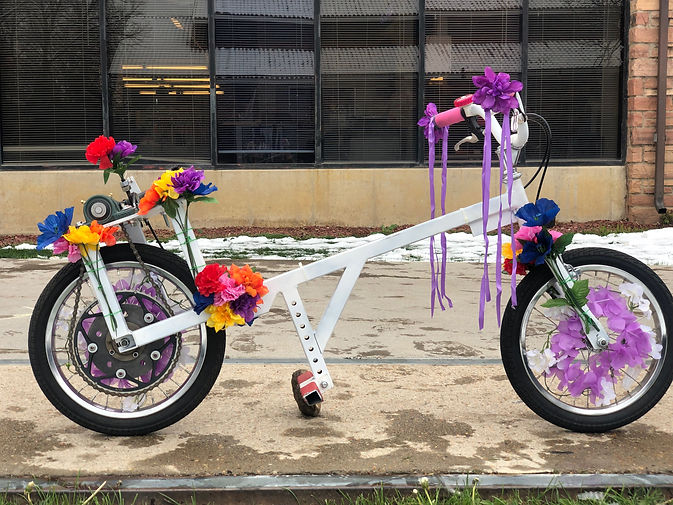
Final Bike
We decorated our bike and got ready for race day. We completed the agility course faster than any other team, and won for aesthetics as well!
